Thursday, September 12, 2013

Pipes, Pipes and More Pipes


No this post is not about plumbing or smoking. This is about the pipes used in GNU/Linux and other operating systems.

A Couple of Notes:

This article is about using redirection, pipes and named pipes in a command shell on a system running GNU/Linux. If you are not interested in command line use, or if you are not interested in using GNU/Linux, please do not bother to make comments about your lack of interest in such things. Comments about how much better other operating systems are, or how outdated command line mode is, will not be posted. I am familiar with, and use, many operating systems. This will not become a forum for arguing the benefits of other operating system. If you want to post a comment that describes a similar method of piping input or output for other operating systems, feel free. Keep it civil and on topic.

Many of the everyday electronic items we now use are running some form of open source software. This allows the system to be modified as desired, or needed, by the user. Most often I find that these items are running a version of GNU/Linux. Anytime I get a new electronic device, I check to see what operating system is running, and what access methods are available

Back to the Pipes:

There are three primary methods to change the standard input, named stdin, and standard output, named stdout, that are commonly used in GNU/Linux operating systems. These are redirection, pipes and named pipes. Is redirection a pipe or is a pipe redirection? In most articles, they consider a pipe to be redirection. I believe that redirection using the < or > symbols is a one way pipe. You are piping the input or output of the command to something other than stdin or stdout. However, in most cases, you will see the use of < or > referred to as redirection and the use of | or a named pipe FIFO referred to as a pipe. I follow that convention most of the time. However, I call redirection a pipe more often than I call a pipe redirection.

Many text mode commands have default output and input devices. Often the default output device is stdout and this is usually directed to the screen, or a window on the screen. The default input device is usually stdin and is most often the keyboard. Both of these, as well as another device, called standard error or stderr, can be redirected to other devices including files or printers.

In our example below, the file /tmp/pipe1, is a named pipe FIFO. Output to it is from the Cat command using a redirection with the > symbol. The default output device for the cat command is stdout so our use of the redirection simply changes the output device to the file, which happens to be a FIFO. This redirection is the first pipe in the example command line.

The second pipe used in the example below is referred to as, simply enough, a pipe and is designated by the vertical bar symbol. The normal function of a pipe is to connect the stdout of the command to the left, to the stdin of the command to the right. It also causes both commands to run at the same time. However, not all commands, by default, accept their input from stdin or send their output to stdout. Ftpput, as used in the example, is such a command. Ftpput does not have a default input device, it must be given an input file or device. More on that in a minute. We still want the Ftpput command to run at the same time as the cat command. The pipe is being used to make that happen.

As mentioned above, not all programs, or commands, have a default input or output. Some, such as ftpput, must be given a file or device to get input from or send output to. In some cases stdin and stdout can still be used. For example, the ftpput command will accept input from stdin two different ways. First, the - symbol can be used in place of the input file name. The - symbol is used by many programs to represent stdin or stdout, depending on where it is used in the command line. In the example, we could use this command line instead of the one given:

#cat (20130908_1916_R*)|ftpput -v -u(user name) -p(password) (192.168.1.203) ("/Home Public/Shows/Actual Show Name and Episode.mpg") -

And it will work fine. In this case, the output from the cat command is being allowed to go to stdout and the input to ftpput is from stdin. The pipe is creating the link to redirect stdout and stdin. In other cases, stdout can be given as a named file with /dev/stdout and stdin can be given as a named file with /dev/stdin. So the command line:

#cat (20130908_1916_R*)>/dev/stdout|ftpput -v -u(user name) -p(password) (192.168.1.203) ("/Home Public/Shows/Actual Show Name and Episode.mpg") /dev/stdin

Will also work.

With either of these alternate command lines, the shell simply creates a FIFO in a buffer and uses it in the same manner as a named pipe FIFO is used.

The third pipe in the example is the FIFO, /tmp/pipe1, which is known as a named pipe. This is a special type of file. It is shown in the directory listing with a p, for pipe, in the first position of the attribute field, the same place that shows a d for a sub-directory. On some operating systems, the directory listing will have the vertical bar symbol at the end of the file name to indicate that the file is a pipe. Using this file, all data that must, or can, be written to or read from a named file may be piped from one command to another command. This type of pipe has some other unique properties besides the name. The file really only exists in the physical realm as a memory buffer and a name in a directory. A directory listing will always show the file as having zero bytes. This is because the file does not accept input from the command doing the writing, until there is a command running that is reading the file. Each byte written to the file is expected to be read right away by another process. The FIFO will cause blocking on one side if the other side is not running. So the cat command will wait for the ftpput command to start looking for data before it starts writing that data.

You may wonder why a named pipe would be used if the same thing can be accomplished using one of the alternate methods of redirection of stdin and stdout. That brings us to another unique property of named pipes. The process, or command, that is writing to the FIFO and the process that is reading from the FIFO do not have to be running in the same shell, or even on the same machine. The example could be broken up so that the cat command is running in one shell terminal and the ftpput command is running in another shell terminal. And the terminals do not have to be on the same machine as long as both have access to the named pipe file and the operating system on both machines recognize that type of file.

Named pipes are persistent so they remain after the processes that are using them end. So the /tmp/pipe1 file in the example remains even after the Cat and Ftpput commands complete and the Telnet session is closed. This is another feature that can be used by programs. it is possible to have a command watching the FIFO that will perform a function when the FIFO is opened by another program or command for data to be written. For example, I have a script that runs all the time on one of my NAS units. It watches a FIFO and sends the data it receives to a file whose name increments each time the command runs. That program receives data from an automatic backup in a program that could only be given a single fixed name for the backup file. Before I started using the FIFO, I had to run a script that renamed all the prior backup files so the fixed name could be used without overwriting the past backup.

There are some other interesting features provided by named pipes. For example, you can read and write to them from multiple programs at the same time. That allows use of things like the Tee command which would allow writing the output to the screen and a file, or to multiple files, at the same time.

This is not intended to be a full Howto for redirection and pipes. I strongly suggest you explore some of the excellent information available on the Internet to learn more about them and how to use them in scripts and programs. This was just an intro to show how I used all three types to accomplish the goal for this case.

The Details and Example:

A little background on what I needed to do and how I did it for this case. Note that I do not use this command line anymore. I have written a shell script that looks for new files on the FAT32 partition and does the cat and ftpput automatically when a new file appears using a database that I created that contains the date and time the file was copied to the partition and the name of the show as I want it stored on the NAS drive.

One of my recent purchases was a new, old stock, DVR device. It was made in 2008 and connects to a network using a wired or wireless Ethernet connection. I found it was capable of a Telnet connection and was running a Linux Venus operating system, a common system for media devices.

This DVR has the capability to copy recorded programs, which are on a UDF file system, to a hard drive. However, it will only copy to a FAT32 partition and it breaks the program up into multiple files, each 2GB, or less. The files are broken up using a Split command, so to use them on other devices they must be put back together. I wanted to save these recordings on network attached storage units, which are formatted as NTFS or EXT3, so they could be viewed from other attached media devices on the network Both of those file systems handle files much larger than the combined file size of any recording. So I just needed to combine the smaller files into one file on the NAS unit.

The other problem was that the DVR gave the files names based on the date and time they were copied to the FAT32 partition. For example, a 3 hour show would have a name, on the FAT32 drive, like 20130908_1917_Rnn.mpg. The Rnn would be R00, R01 and R02 for the three files the program was split into. I wanted the actual name of the show to be the final name on the NAS.

Checking the available commands on the DVR through a Telnet connection, showed that the only method to get a file to a NAS drive was using a Ftpput command. There was no Mount command that could be used to mount a remote share and there was no standard FTP command that would allow wildcard copies. So the copy to the NAS would need to be a single file at a time. I would then need to combine the files on the NAS drive and rename the resulting file. Without using redirection and pipes, this would require dealing with each bit of data at least three times on the network.

Here was the solution I decided to use instead:

I opened a Telnet session to the DVR. After logging in and changing to the directory where the DVR saved the copied files, I issued the following command in the shell.

Note: This is the example referred to above;

#mknod /tmp/pipe1 p;cat (20130908_1916_R)*>/tmp/pipe1|ftpput -v -u(user name) -p(password) (192.168.1.203) ("/Home Public/Shows/Actual Show Name and Episode.mpg") /tmp/pipe1

The ( and ) symbols in the command line shown are not typed into the actual command line. They are used here to indicate items that would need to be changed to match the actual items on your system. For example, your user name and password on the NAS unit you are copying to. However, the " symbols were needed since the path and file name have spaces in them..

The Mknod command was used to create the named pipe FIFO file /tmp/pipe1. On newer GNU/Linux systems a Mkfifo command is frequently available for this. This system did not offer that command. The p after the file name tells Mknod that the file is going to be a named pipe FIFO. As noted earlier, this file is persistent, so that command does not really have to be run each time. However if the file exists, the command simply presents a message to that effect and the shell continues with the next command.

For those who are not familiar with this, you will notice a semicolon after the Mknod command. The semicolon tells the shell to run the Mknod command and, when it finishes, to run the Cat command. This is in contrast to the vertical bar symbol used between the Cat command and the Ftpput command which tells the shell to run both commands at the same time.

Next, a Cat command is used to concatenate the multiple files into a single file using redirection to the FIFO /tmp/pipe1. The Cat command simply reads the file(s), in order, and creates an output which is normally directed to stdout. Redirection of stdout to a file is done using the > symbol. It can also be redirected using a standard pipe with the | symbol. For example "cat sometext.txt|more" would cause Cat to read the file sometext.txt and send it to the More command so it is displayed one page at a time in the console.

The Cat command and the Ftpput command are tied together with a standard pipe so they will run at the same time. Doing this causes the Cat command to open the FIFO for writing and the Ftpput command to open the FIFO for reading at the same time. As data is written to the FIFO by Cat, it is read by Ftpput and sent to the remote file system as a single file. When the Cat command completes, it closes the FIFO for writing. The Ftpput command will see that the FIFO has been closed and, once all data has been processed, will close the file for reading and exit.


Thursday, March 12, 2009

Linux Has Worse Device Support Than Windows...I Don't Think So

I was cleaning a virus out of a Windows XP system for a client when the UPS driver showed up with my latest gadget. The virus was one of the fake Anti-Virus viruses, you know, the kind that pops up all kinds of warnings that your system is infected or you are being attacked from some random IP address even when you are not connected to the Internet. We should be able to start a class action suit against these folks for the money they cost our clients. Anyhow, the gadget was a new MP4 watch. I am a sucker for watches that do other things.

The package showed that the watch software required Windows 2000, XP or Vista. I had a computer close by that runs XP so I decided to test the watch on it. The only printed paper inside the package was a list, in several languages, of the contents of the box.

I hooked the cable up to the watch, then to the computer. A box popped up that said new hardware was found. Then a box popped up asking where I wanted to search for the drivers. I put the CD in and told the system to search everywhere. After a while, I got a message that no driver was found. Next, I checked the CD and saw a setup program so I ran that. After a while, and with several clicks to accept EULAs, I got a message telling me to connect the watch and click next. The watch was still connected, so I clicked next. The same message came back up. I thought that maybe disconnecting the watch and then plugging it back in might work. No go, same message. Time to try a restart.

I unplugged the watch and restarted the system. When I ran the setup program this time, I got a message that the software was already installed. I plugged the watch in and up popped the new device message. This time, I did not get a box to search for a driver. No new drive showed up in Explorer and there was no new program group for the software. So, I unplugged the watch, opened Add/Remove Software and removed the watch software. Reboot and try again.

This time, I left the watch unplugged and started setup. The message to plug the watch in came up. I plugged the watch in and pressed next. Same message. Uninstall the software again. I checked Device Manager and sure enough there was the watch as a USB storage device. I removed the device and unplugged the watch. Reboot again.

Time to try running setup and keeping fingers crossed. When it got to the message to plug the watch in, I did and clicked next. No message and a lot of activity from the CD. I finally got a message that the installation was complete. The watch showed up in Explorer and the software was in the Start Menu.

It only took 4 1/2 hours to get to this point but everything was working. I can upload files to the watch and they play fine. By this time, I have also finished my clients computer and have it ready to return.

When I got back, I decided to see what would happen if I plugged the watch into one of my Debian GNU/Linux computers. As soon as I plugged it in, two new USB storage device icons showed up on my desktop. I right clicked them and clicked mount. I opened Konqueror and there in /media were the drives. I copied files to the watch then closed Konqueror. I right clicked one of the watch icons and clicked Safely Remove and then unplugged the watch. The new files were there and played fine.

Total time to get the watch working in Linux, 1/4 hour.

Which system is it easier to get devices working in?

By the way, I love the watch. I will do a review of the watch when I finish the BASIC series.

Wednesday, June 25, 2008

Plastic Welding for Fun and Savings

Sometimes a hobby can be more than just fun. It can be a great way to save money.

Plastic welding is that type of hobby. I started welding plastic about 10 years ago. Over the years, I have used plastic welders to build and repair enclosures, mounting brackets, car parts, kids toys, and many other items. It is fun and the results are useful.

There are two basic types of plastic welders; hot air and airless. I started with an airless Mini-Weld by Urethane Supply Company. It is similar to a soldering iron but with a temperature control and tips designed for the job. Since then, I have added three hot air type welders. The Mini-Weld is still the one I use most of the time. It is the "goto" tool for repairs and quick jobs.

The project for today was to repair torn out mounting holes in a plastic guard for a mini-van. The guard also provides mounting for the bumper cover. With the holes torn the cover was flexing.

This is what the holes looked like:

The torn diameter is almost 1" the hole should be 1/4". There were four holes like this in the guard.


This is how I repaired the guard;


1. Identify the type of plastic. The repair technique will vary depending on the type of plastic involved. Most plastics have identifiers stamped on them. This is the stamp on the guard:

It is Thermoplastic Olefin, TPO, which can be repaired with FiberFlex welding rod.

If you are not sure of the type of plastic, Urethane Supply Co. has a page that can help here.


2. Gather the need materials. For this job, I will use the Mini-Weld, FiberFlex Rod, and Stainless Reinforcing Mesh.


3. Clean the part. I use Dawn Ultra to remove heavy dirt and grease. Then rinse with plenty of warm water. Next I clean with a plastic cleaner and follow by wiping with alcohol to get the last traces of oil. Then, sand the area of the repair with 80 grit sandpaper to give the repair something to grab.


4. Put reinforcing mesh on the back side of the repair.

Notice that I put the mesh along the sides of the cavity as well. That is because this part will get stressed as the guard drags on the steep driveways we have here. I want it to have the extra strength.


5. Melt the mesh into the plastic, then cover with FiberFlex.


6. Fill hole on outside with FiberFlex overlapping the hole by at least 1/4".


7. Smooth and let repair cool. Then drill hole for bolt.


Repairing all four torn out holes in this guard, took about 45 minutes and used about $4.00 of supplies. Quite a saving.

For more information on Plastic Welding and Plastic Welders check out Urethane Supply Company. They have a very informative web site with a lot of pages on specific repairs. They also have a PDF, The Book of Plastic Repair, that is packed with how to information.

An extra benefit of plastic welding is the recycling of plastic materials. The items that you repair save landfill space. And, you will find yourself saving scraps of plastic from other items to use as fill material. Unlike metal welding where you have to have special rod to use for filler, with plastic you can use any scraps of the same material as filler. I often use the cut off ends of nylon wire ties as filler. Plastic welding is an Earth friendly hobby.

Wednesday, June 11, 2008

Saving Flooded Electrical and Electronic Equipment

The recent flooding in many areas of the United States reminded me that I wanted to address this issue.

I lived in South Louisiana, an area very prone to flooding, for most of my life. I worked in the electronic systems business there for more than thirty years. Spending time on the water is a big part of life in Louisiana. As a result, I have seen several thousand pieces of equipment that have flooded.

I also have seen, and heard, many very bad recommendations for drying equipment out. I can say, without hesitation, any suggestion that involves heating the unit to dry it out, without disassembling and rinsing, is a very bad idea. Putting the unit in an oven, clothes dryer, under heat lamps, in front of a hair dryer, and so on, is not the proper way to save expensive electronic or electrical equipment. None of these methods address the fact that most water has chemicals and minerals that are conductive and/or corrosive. If not properly removed they will cause damage.

Before considering having a flooded item repaired by any shop, ask how they will handle the job of initial drying. A shop that is planning on using any method of heating, prior to disassembly and cleaning, should not be given the job. Do not consider any shop that is not going to flush the unit with clean water while taking it apart. These are important questions to ask, I have seen very expensive equipment, taken to otherwise excellent repair shops, destroyed by improper drying techniques.

Some equipment will not be cost effective to save. Some equipment will not be able to be saved. But, I have found that many items can be saved if handled properly and promptly.

What should be done to improve the chances of saving equipment?


As soon as the item is removed from the water:
  • Take out any batteries that are accessible.
  • Do not let it dry out, even a little bit, if you can help it.
  • Flush with plenty of clean water.
  • Put the item in a container of clean water keeping the item completely submerged. If clean water is not available, use the water that the item was in until clean water is available.
  • Start the recovery process as fast as possible.

Just those steps will improve the chances of saving the equipment.


If you are going to try to dry the items out.

This is the method that I have used to dry out items ranging from pagers and cell phones to laptops and marine electronics.

Note: See the section below for special notes about battery packs and hard drives.

Plan to work at a sink or in a location where the unit can be flushed with clean warm water while it is being taken apart.

Gather these items prior to taking the unit out of the container of water:
  • Clean warm water supply and, if possible, distilled water for final rinse.
  • Proper tools to disassemble unit.
  • Good quality contact cleaner.
  • Soap, I use Dawn Ultra. Mix this ahead of time, 1 tablespoon to 1 gallon warm water.
  • Light machine oil.
  • WD-40.
  • Silicon spray.
  • Hair dryer.
  • Dry compressed air.
  • Soft nylon brushes.
  • Brass brush.
  • Plenty of soft towels and rags.
  • Static controlled work station.

Once you have everything ready:

Work fast! Disassemble the item as much as you can. Items that can not be cleaned within a few minutes should be placed back in a container of fresh water.

Rinse each piece with clean warm water then look for any deposits. Pay close attention to areas that could trap minerals, like the area between an IC and circuit board. These should be cleaned with a soft nylon brush dipped in the soap. Follow with another rinse to get all traces of soap off. Run clean water into any controls and switches. Use distilled water for final rinse.

Place each item on a soft towel and begin drying as you finish rinsing. Pat dry all parts that you can get to. Then use dry compressed air to blow out any water that you could not get by hand. Use a hair dryer on low heat to be sure all traces of water are dried out.

Spray controls, switches and connectors with WD-40 and follow with contact cleaner. Be sure that the contact cleaner is compatible with any plastic parts before using it.

Metal parts should be wiped then examined for corrosion. If light rust is found, use the brass brush to remove it. Follow up, if the part is not stainless or aluminum, by wiping with a soft cloth and a light machine oil. Items, like hinges, should be sprayed with WD-40 then allowed to dry. Follow this with silicon spray.

Leave all parts, at least overnight, on dry soft towels.

Before reassembly, check for any signs of corrosion, rust, and overheating. Pay attention to circuits around the battery or power connections. Also, look closely at things like displays for any sign of moisture remaining in them.

Once reassembled, check for short circuits prior to putting power on the item. When powered up, watch closely for several hours to be sure there are no signs of overheating.


What about battery packs and hard drives?

These two items need special attention.

Battery packs should be replaced. With that said, I normally dry them out the same way as the rest of the circuits. Then I test them to see if they will still work. Most of the time, they do. However, I never give a warranty on them. If I am working on an item for a client, I always replace the batteries.

Hard drives should never be powered up except by a professional hard drive recovery facility! They must be replaced always.

If a hard drive has data that must be recovered, these are the steps that I use:

  • Remove from the equipment.
  • Rinse with clean warm water only.
  • Place in sealed container of clean water.
  • Send, overnight, to recovery facility.

Contact a recovery facility ahead of time and make sure they are equipped to handle flooded drives and experienced with them. They will tell you how to package the drive for shipping to them.

Saturday, April 5, 2008

Using GNU/Linux Tools to Recover DVD Video

Have you ever recorded an important video on a home DVD recorder? Do you use a camcorder that records directly on DVD disks? If you have had a recording fail to finalize properly, rendering it unusable, this post may help you.

I bought a DVD recorder from Walmart a few years ago. For the first several months, I used it to record many shows with no problems. I came to trust it to replace my VHS recorder. Then, I started to have problems. The recordings were not always completing properly. The unit would look normal while the show was recording, but when it stopped, the display would show, "Bad Disk." I could not do anything with the disk. It would not play, it would not finalize, it was a coaster. This recorder was an ILO DVDR05/ZU. I understand that this model was also sold as a CyberHome 1600 and the problems were the same. Technical support was non-existent and Walmart had discontinued that model. There were stories, similar to mine, all over the internet.

After losing several one shot shows, mostly news clips, I started recording on both VHS and DVD just to be sure I got important shows recorded. I soon replaced the recorder with a new one from a different manufacturer. I later found and repaired the problem with the ILO recorder. But, I was still left with several bad DVDs that contained video clips that I really wanted to keep. These were things that I could not get again. That is what prompted me to find a way to recover the video from these disks.


Caution:
This procedure uses GNU/Linux programs that must be run from a command line. While the commands used are not difficult, you should feel comfortable in a command console if you are going to try this. I have not attempted to do this type of recovery in any other operating system, such as Microsoft Windows. It may be something that can be done easily in other operating systems or with other GNU/Linux tools. I have used this basic procedure to recover video from more than sixty DVDs.


Note:
This is not a procedure to copy data from commercial DVDs that use CSS or other content protection systems. If you are looking for that, this will not help you. This method will not decrypt or rip video from protected DVDs.


These are the programs I use with links to their home pages:

dvdisaster Used to recover the data from the bad disk into a file. This is not the normal or intended use of dvdisaster. However, it does the best job of all the programs and tools that I have attempted to use to extract the data.

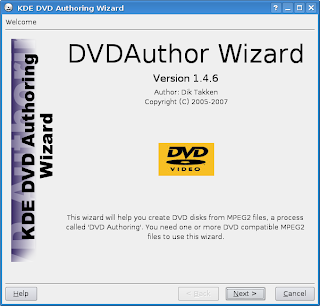
KDE DVD Authoring Wizard To create the new DVD image.

Konqueror Useful to preview parts of the file prior to reassembly.

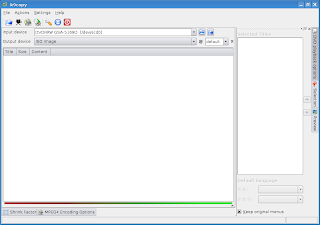
K9Copy Not required but handy for shrinking the final files to fit on a single disk.

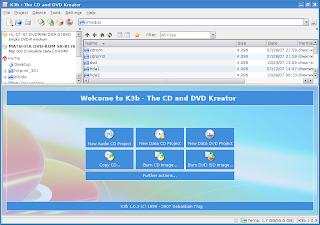
K3b Used to burn the new DVD.

FFmpeg Formats the video for DVD.

KHexEdit (Optional but very useful for advanced editing of the data files)

Split, cat and rm, from the GNU/Linux command set Used for file management.


In the typed commands that I show, the # sign shows that it is a terminal command. Do not type the # sign, just the line following it.


The first step is to get the data that exists on the DVD into a file where we can work with it. Even though it was not written for this job, dvdisaster is the tool that is easiest to use. It does a great job of extracting the raw data from a disk that would otherwise be a decoration.

To prepare for the data, create a directory on a drive that has at least twice as much space available as the DVD contains. If the DVD is a normal single side, single layer, you should have at least 10Gb available on the drive. In that directory, create two sub-directories to put files in while you work. I normally use ~/tempdvd for the base and ~/tempdvd/tmp1 and ~/tempdvd/tmp2 for the work areas.

Put the bad disk in a drive and start dvdisaster;


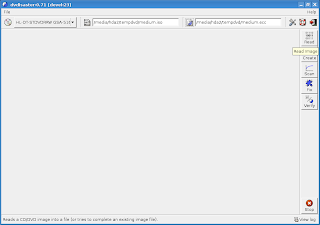
Select the drive that contains the bad DVD. Fill in the path and file name for the .iso image. The .ecc file will not be used for this step so you can disregard that field. Then click the "Read" icon on the right to start reading.

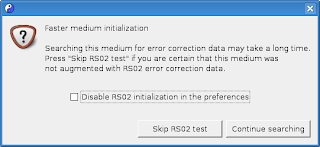
You will get a dialog that looks like;


Click "Skip RS02 test".

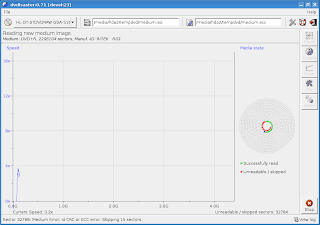
The recovery will start;


The chart on the left side displays the current read speed for the operation. The graphic on the right, shows the success or failure for areas of the disk as the operation proceeds. It is normal for the first blocks to be unreadable.

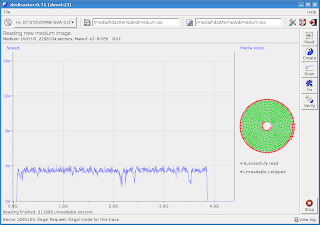
When the read operation completes, the display will look like this;


Just below the graph on the left, it will say, "Reading finished:" and will give the number of sectors that were not able to be read.

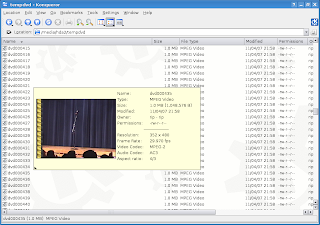
Konqueror should show the .iso image file in the tempdvd directory;

Open a terminal window and change into the tempdvd directory. Type the command;
#split -a6 -b1048576 -d filename.iso dvd
replacing the "filename" with your actual file name.

The only indication you will get that the command is finished, will be when the command prompt returns. Be patient, it will take some time for the file to be split.

If you have limited space available on the drive you are using, you can delete the .iso file now.

You will have a lot of 1Mb files in the directory. Most of them should have a type of "MPEG Video" if the extraction and split worked properly. In Konqueror, you can hover the cursor over a file name and see a preview of the video. You can use this to get an idea of which pieces you want to combine for the final video. This gives you some rough editing capability. Want to get rid of commercials? Just leave those files out at the next step.


Move the files for the first clip that you want to keep to the tmp1 directory. Just skip any files that you do not want in the clip and move the ones that you do want.

Now go back to the command terminal and change to the tmp1 directory. use the following commands to prepare the first clip:

#cat dvd* > vin.mpg

#rm dvd*

#ffmpg -i vin.mpg -target dvd ../tmp2/clipNNN.mpg
(replace NNN with a different number for each clip)

#rm vin.mpg

When you finish you will have an empty tmp1 directory and the first video clip in the tmp2 directory. Repeat the steps, starting with moving the files to tmp1, for each additional clip that you want to recover.

When you have all the clips in the tmp2 directory, you can delete the remaining files from the tempdvd directory.

The rest of the programs are being used for their intended tasks, so I will not go over the steps inside each program from here.

Use KDE DVDAuthor Wizard to turn the clips back into a properly structured DVD format.


If the final video file is too large to fit on one disk, use K9Copy to shrink it to fit.


Use K3b to burn the image to a disk.


Test your DVD and take pride in having saved your video.


This procedure has recovered many video files from DVDs that were otherwise useless. This is not intended to be an in depth how to article, it should be used as a starting point. There are other techniques that I employ to improve the quality of the final videos. Anyone who wishes to get better quality video, should do further research. I use KHexEdit to get more precise splitting and editing of the video data. I also use other options of FFmpeg to improve the final video quality.

Note Added 04/12/2008: It seems that I did not make it clear what the procedure is written for. I keep getting suggestions that all I need to do is mount the .iso or burn it to a new blank disk to get the video files. So, this is for cases where the session does not close properly or, the disk does not finalize. When that happens, the control data, which normally would tell the drive what type of disk it is and where the files are located, does not get written to the proper sectors at the beginning of the data track. The .iso does not contain that data and will not mount even if you specify the type with the -t option to the mount command. Writing the .iso to a new blank will create another disk with the missing data.