I bought a DVD recorder from Walmart a few years ago. For the first several months, I used it to record many shows with no problems. I came to trust it to replace my VHS recorder. Then, I started to have problems. The recordings were not always completing properly. The unit would look normal while the show was recording, but when it stopped, the display would show, "Bad Disk." I could not do anything with the disk. It would not play, it would not finalize, it was a coaster. This recorder was an ILO DVDR05/ZU. I understand that this model was also sold as a CyberHome 1600 and the problems were the same. Technical support was non-existent and Walmart had discontinued that model. There were stories, similar to mine, all over the internet.
After losing several one shot shows, mostly news clips, I started recording on both VHS and DVD just to be sure I got important shows recorded. I soon replaced the recorder with a new one from a different manufacturer. I later found and repaired the problem with the ILO recorder. But, I was still left with several bad DVDs that contained video clips that I really wanted to keep. These were things that I could not get again. That is what prompted me to find a way to recover the video from these disks.
Caution: This procedure uses GNU/Linux programs that must be run from a command line. While the commands used are not difficult, you should feel comfortable in a command console if you are going to try this. I have not attempted to do this type of recovery in any other operating system, such as Microsoft Windows. It may be something that can be done easily in other operating systems or with other GNU/Linux tools. I have used this basic procedure to recover video from more than sixty DVDs.
Note: This is not a procedure to copy data from commercial DVDs that use CSS or other content protection systems. If you are looking for that, this will not help you. This method will not decrypt or rip video from protected DVDs.
These are the programs I use with links to their home pages:
dvdisaster Used to recover the data from the bad disk into a file. This is not the normal or intended use of dvdisaster. However, it does the best job of all the programs and tools that I have attempted to use to extract the data.
KDE DVD Authoring Wizard To create the new DVD image.
Konqueror Useful to preview parts of the file prior to reassembly.
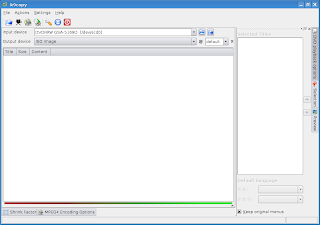
K9Copy Not required but handy for shrinking the final files to fit on a single disk.
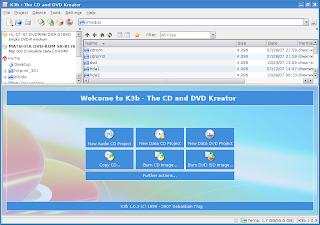
K3b Used to burn the new DVD.
FFmpeg Formats the video for DVD.
KHexEdit (Optional but very useful for advanced editing of the data files)
Split, cat and rm, from the GNU/Linux command set Used for file management.
In the typed commands that I show, the # sign shows that it is a terminal command. Do not type the # sign, just the line following it.
The first step is to get the data that exists on the DVD into a file where we can work with it. Even though it was not written for this job, dvdisaster is the tool that is easiest to use. It does a great job of extracting the raw data from a disk that would otherwise be a decoration.
To prepare for the data, create a directory on a drive that has at least twice as much space available as the DVD contains. If the DVD is a normal single side, single layer, you should have at least 10Gb available on the drive. In that directory, create two sub-directories to put files in while you work. I normally use ~/tempdvd for the base and ~/tempdvd/tmp1 and ~/tempdvd/tmp2 for the work areas.
Put the bad disk in a drive and start dvdisaster;
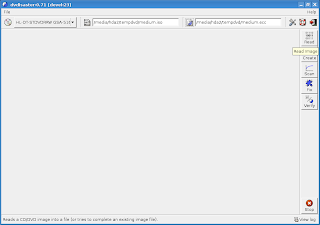
Select the drive that contains the bad DVD. Fill in the path and file name for the .iso image. The .ecc file will not be used for this step so you can disregard that field. Then click the "Read" icon on the right to start reading.
You will get a dialog that looks like;
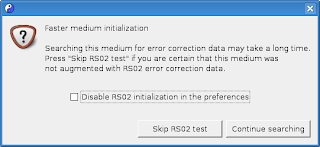
Click "Skip RS02 test".
The recovery will start;
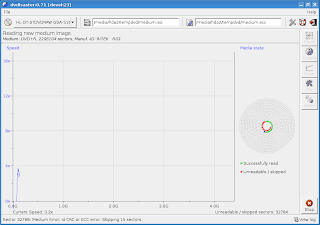
The chart on the left side displays the current read speed for the operation. The graphic on the right, shows the success or failure for areas of the disk as the operation proceeds. It is normal for the first blocks to be unreadable.
When the read operation completes, the display will look like this;
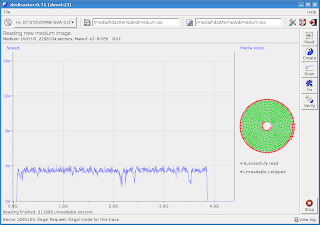
Just below the graph on the left, it will say, "Reading finished:" and will give the number of sectors that were not able to be read.
Konqueror should show the .iso image file in the tempdvd directory;
Open a terminal window and change into the tempdvd directory. Type the command;
#split -a6 -b1048576 -d filename.iso dvd
replacing the "filename" with your actual file name.
The only indication you will get that the command is finished, will be when the command prompt returns. Be patient, it will take some time for the file to be split.
If you have limited space available on the drive you are using, you can delete the .iso file now.
You will have a lot of 1Mb files in the directory. Most of them should have a type of "MPEG Video" if the extraction and split worked properly. In Konqueror, you can hover the cursor over a file name and see a preview of the video. You can use this to get an idea of which pieces you want to combine for the final video. This gives you some rough editing capability. Want to get rid of commercials? Just leave those files out at the next step.
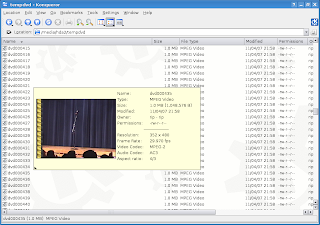
Move the files for the first clip that you want to keep to the tmp1 directory. Just skip any files that you do not want in the clip and move the ones that you do want.
Now go back to the command terminal and change to the tmp1 directory. use the following commands to prepare the first clip:
#cat dvd* > vin.mpg
#rm dvd*
#ffmpg -i vin.mpg -target dvd ../tmp2/clipNNN.mpg
(replace NNN with a different number for each clip)
#rm vin.mpg
When you finish you will have an empty tmp1 directory and the first video clip in the tmp2 directory. Repeat the steps, starting with moving the files to tmp1, for each additional clip that you want to recover.
When you have all the clips in the tmp2 directory, you can delete the remaining files from the tempdvd directory.
The rest of the programs are being used for their intended tasks, so I will not go over the steps inside each program from here.
Use KDE DVDAuthor Wizard to turn the clips back into a properly structured DVD format.
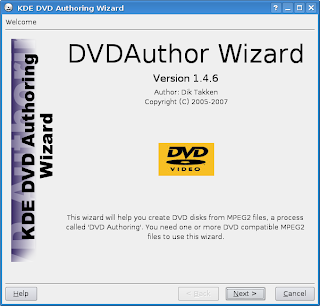
If the final video file is too large to fit on one disk, use K9Copy to shrink it to fit.
Use K3b to burn the image to a disk.
Test your DVD and take pride in having saved your video.

This procedure has recovered many video files from DVDs that were otherwise useless. This is not intended to be an in depth how to article, it should be used as a starting point. There are other techniques that I employ to improve the quality of the final videos. Anyone who wishes to get better quality video, should do further research. I use KHexEdit to get more precise splitting and editing of the video data. I also use other options of FFmpeg to improve the final video quality.
Note Added 04/12/2008: It seems that I did not make it clear what the procedure is written for. I keep getting suggestions that all I need to do is mount the .iso or burn it to a new blank disk to get the video files. So, this is for cases where the session does not close properly or, the disk does not finalize. When that happens, the control data, which normally would tell the drive what type of disk it is and where the files are located, does not get written to the proper sectors at the beginning of the data track. The .iso does not contain that data and will not mount even if you specify the type with the -t option to the mount command. Writing the .iso to a new blank will create another disk with the missing data.

22 comments:
I am surprised that you could use the split command on a resulting ISO file and magically get all the individual pieces to be of type MPEG video.
Maybe you need to mount the ISO using the
'mount -t auto -o loop vin.iso /my/dir/' command and then use some other utility to split the VOBs in the VIDEO_TS directory.
Just using the split command directly on any ISO doesn't look like the right thing to do IMHO.
Very good experiment!.
amazing that you are able to stitch small pieces together.
Very nice way to recover!
I use KHexEdit to get more precise splitting and editing of the video data.
Do you look for frame boundaries? Can you give more details on how you do it? Also, is the ffmpg step required to remove any partial frame chunks that may have remained in the file due to the split, select, cat steps?
thx for this article, mayby U can also write something about FFmpeg & KHexEdit? peace.
The problem with trying to mount the .iso using loop is that the discriptors and file allocation tables are not there for it to read. That is why the first few sectors fail. That is what usually goes wrong with the finalize. Also, the pieces being recognized as type MPEG is not magic. Konqueror does a great job of checking the first bytes of a file to determine what type of data is in the file.
pavan said; "Do you look for frame boundaries? Can you give more details on how you do it? Also, is the ffmpg step required to remove any partial frame chunks that may have remained in the file due to the split, select, cat steps?"
Yes, I do use KHexEdit to look for valid frames and FFmpeg corrects most missing and out of order frames caused when you skip sections.
I considered including more detail about the steps I use involving KHexEdit and FFmpeg. But, that makes it much too complex for most Gnu/Linux users. It also becomes too long for a blog post. It would probably fit better into a full length article. My goal was to provide something that an average user can follow. I have waked people with no prior experience through this procedure by phone.
When I finish my current project, I will try to put something together on the other steps.
Thanks for the comments.
Here is my two bits:
- copy and paste my comment into a text
editor
- fix stdio.h and stdlib.h
- compile my following C code (dvchop)
- use dvdisaster
- use the newly compiled dvchop
- pick the .vob files you want to keep
#include stdio.h> /* put < before stdio.h and stdlib.h */
#include stdlib.h>
/* Compile as follows for > 2GB file access */
/* gcc -Wall -D_FILE_OFFSET_BITS=64 dvchop.c -o dvchop */
/* */
/* Author: (c) David Savinkoff 2008 */
/* License: GNU LGPL version 3 */
/* */
/* This program reads concatenated .VOB files or an .iso file */
/* from stdin and makes a bunch of small files using the output */
/* filename provided on the command line. */
/* If an output file ends in j.vob it was not recognised. */
/* Note that this program will not recogise anything if the */
/* file input doesn't start on the first byte of a sector. */
/* */
/* usage: cat filename(s) | dvchop output_filename */
/* usage: cat unfinalizedDVD.iso | dvchop dvd.vob */
void exit4error(char *string)
{ fputs(string, stderr); exit(1);
}
int main(int argc, char *argv[])
{ FILE *fd1;
void *buff1, *buff2;
char OutputFileName[66];
unsigned char *chk, *buf;
double SCR, prevSCR;
int SubFileNumber=0, Buffered=0, n;
if(argc!=2) exit4error("usage: cat filename(s) | dvchop output_filename\n");
if((buff1=calloc(512,4)) == NULL) exit4error("calloc error\n");
if((buff2=calloc(512,4)) == NULL) exit4error("calloc error\n");
chk=buff1;
buf=buff2;
snprintf(OutputFileName, 64, "%s%.3dj.vob", argv[1], SubFileNumber);
printf("processing: %s\n",OutputFileName);
if((fd1=fopen(OutputFileName,"wb")) == NULL)
exit4error("output file error\n");
prevSCR=2576980378112.0;
for(;;)
{ if(fread(buff1, 4, 512, stdin) != 512)
exit4error("");
if(chk[0]==0x00 && chk[1]==0x00 && chk[2]==0x01 && chk[3]==0xba)
{
SCR=300.0*((chk[8]>>3)+chk[7]*32.0+(((chk[6]&~7)>>1)+(chk[6]&3))*8192.0+
chk[5]*1048576.0+(((chk[4]&(8+16+32))>>1)+(chk[4]&3))*268435456.0)
+(chk[9]>>1)+(chk[8]&3)*128.0;
if(SCR <= prevSCR)
{ fclose(fd1);
if(SubFileNumber++ >100) exit4error("too many output files generated\n");
snprintf(OutputFileName, 64, "%s%.3d.vob", argv[1], SubFileNumber);
printf("processing: %s\n",OutputFileName);
if((fd1=fopen(OutputFileName,"wb")) == NULL)
exit4error("output file error\n");
}
if(Buffered==1)
{ if(fwrite(buff2, 4, 512, fd1) != 512)
exit4error("output file error\n");
Buffered=0;
if(SCR<=prevSCR)
{ fclose(fd1);
if(SubFileNumber++ >100) exit4error("too many output files generated\n");
snprintf(OutputFileName, 64, "%s%.3d.vob", argv[1], SubFileNumber);
printf("processing: %s\n",OutputFileName);
if((fd1=fopen(OutputFileName,"wb")) == NULL)
exit4error("output file error\n");
}
}
prevSCR=SCR;
}else
{
if(Buffered==1)
{ if(fwrite(buff2, 4, 512, fd1) != 512)
exit4error("output file error\n");
Buffered=0;
}
if(prevSCR<2576980378112.0)
{ fclose(fd1);
if(SubFileNumber++ >100) exit4error("too many output files generated\n");
snprintf(OutputFileName, 64, "%s%.3dj.vob", argv[1], SubFileNumber);
printf("processing: %s\n",OutputFileName);
if( (fd1=fopen(OutputFileName,"wb")) == NULL)
exit4error("output file error\n");
}
prevSCR=2576980378112.0;
}
if(chk[17]==0xBB)
for(Buffered=1, n=2048; n--;)
buf[n]=chk[n];
else
if(fwrite(buff1, 4, 512, fd1) != 512)
exit4error("output file error\n");
}
return 0;
}
The Metod is great and the last C code is awesome, Thank you!
It worked perfectly !!
It worked for me, thanks a lot!
(http://musante.i.ph/blogs/musante/2009/08/18/recovering-a-unfinished-dvd-using-linux/)
My friend and I were recently talking about technology, and how integrated it has become to our daily lives. Reading this post makes me think back to that discussion we had, and just how inseparable from electronics we have all become.
I don't mean this in a bad way, of course! Societal concerns aside... I just hope that as memory gets cheaper, the possibility of uploading our memories onto a digital medium becomes a true reality. It's one of the things I really wish I could see in my lifetime.
(Posted on Nintendo DS running [url=http://quizilla.teennick.com/stories/16129580/does-the-r4-or-r4i-work-with-the-new-ds]R4i SDHC[/url] DS SysBro)
I used your steps on recovering some video for my parents and although it took a little bit to understand it completely, it definitely does work. Thank you for this helpful post
When I tried to execute ffmpeg, I've got the following error:
ffmpeg -i vin.mpg -target dvd movie.mpg
FFmpeg version SVN-r0.5.1-4:0.5.1-1ubuntu1, Copyright (c) 2000-2009 Fabrice Bellard, et al.
configuration: --extra-version=4:0.5.1-1ubuntu1 --prefix=/usr --enable-avfilter --enable-avfilter-lavf --enable-vdpau --enable-bzlib --enable-libgsm --enable-libschroedinger --enable-libspeex --enable-libtheora --enable-libvorbis --enable-pthreads --enable-zlib --disable-stripping --disable-vhook --enable-runtime-cpudetect --enable-gpl --enable-postproc --enable-swscale --enable-x11grab --enable-libdc1394 --enable-shared --disable-static
libavutil 49.15. 0 / 49.15. 0
libavcodec 52.20. 1 / 52.20. 1
libavformat 52.31. 0 / 52.31. 0
libavdevice 52. 1. 0 / 52. 1. 0
libavfilter 0. 4. 0 / 0. 4. 0
libswscale 0. 7. 1 / 0. 7. 1
libpostproc 51. 2. 0 / 51. 2. 0
built on Mar 4 2010 12:35:30, gcc: 4.4.3
vin.mpg: could not find codec parameters
What coded shall be missing?
It is remarkable, it is rather valuable phrase
I came to a couple of threads in this forum froma Google search; they were not useful to me, as they do not contain the answer, just the question... but then I found the answer by myself. So I tried to updatr the thread, but I'm too newbie in this forum to update suach an old thread!
Anyway, this is my solution:
I tried unpacking the installer rather than running it, to prevent messing up the system, using Universal Extractor; it works, and application starts... but the installer actually connects the application to several others application, which if not properly installed prevent main app from working (e.g. from finding audio stream in AVI file).
Installing the app by running its installer solved the problem.
[url=http://www.topvideoconverter.com/dv-to-dvd-converter/]mini dv to dvd converter[/url]
Interesting post! I also used K3b to burn all my favorite movies. One of the most reliable DVD burning software I have ever used.
Very interesting. What if the DVD I have is a data-DVD. An old DVD-R I have has a bunch of image files. Using, DVDisaster, I have managed to crate the iso file. Now what?
It was a very nice idea! Just wanna say thank you for the selective information you have
distributed.
'Anonymous said...
Very interesting. What if the DVD I have is a data-DVD. An old DVD-R I have has a bunch of image files. Using, DVDisaster, I have managed to crate the iso file. Now what?'
Sorry I did not see your comment sooner.
I would mount the .iso file as a drive and then run Photorec on the entire drive. It will take a while and you will need a place that it can write the recovered files to that has enough free space for them. But it usually recovers all of the files.
Photorec is another great program.
There is some much garabage on blogs nowadays that it is hard to discover the accurate diamonds. Glad i just found one. thanks:)
Hi! I was recording a DVD-R on an RCA DVD and the power source went off all the connected systems colapsed because of a light-power off problem so it did not ended recording or stopped recordinng and was not finalized now it is unusable how can I fix it it was a very special video
Hi Mayra, The procedure in the post may work for your situation. That is the type of thing it was written for. I have had that happen and used this procedure to recover the files many times. If you have trouble and need questions answered please let me know. Thanks for reading, Rip
Very good experiment!.
amazing that you are able to stitch small pieces together.
Post a Comment